Can You Still Get Loot From Doing Raid Again Destiny 2
Quick Links
- The Three Ways To Get To Ainsel River
- Ainsel River Depths Walkthrough
- Ainsel River Main Walkthrough
- Nokstella, Eternal City
- Notable Field Bosses In Ainsel River
- Notable Loot In Ainsel River
Ainsel River is an underground department of the map in Elden Ring. It consists of 3 different areas. A lower area, a higher expanse, and the lost Eternal Urban center of Nokstella. There are multiple ways to enter these locations, and information technology'due south a crucial part of Ranni The Witch's side quest.
This guide volition show you how to get through Ainsel River to the very end, without excluding any of import loot and bosses along the mode. Completing the Ainsel River map is not necessary for completing Elden Ring, unless you want to complete the Age of The Stars ending.
The 3 Ways To Go To Ainsel River
There are two parts to the Ainsel River, and they don't naturally connect. You have to access Ainsel River Depths differently than you would access Ainsel River Main.
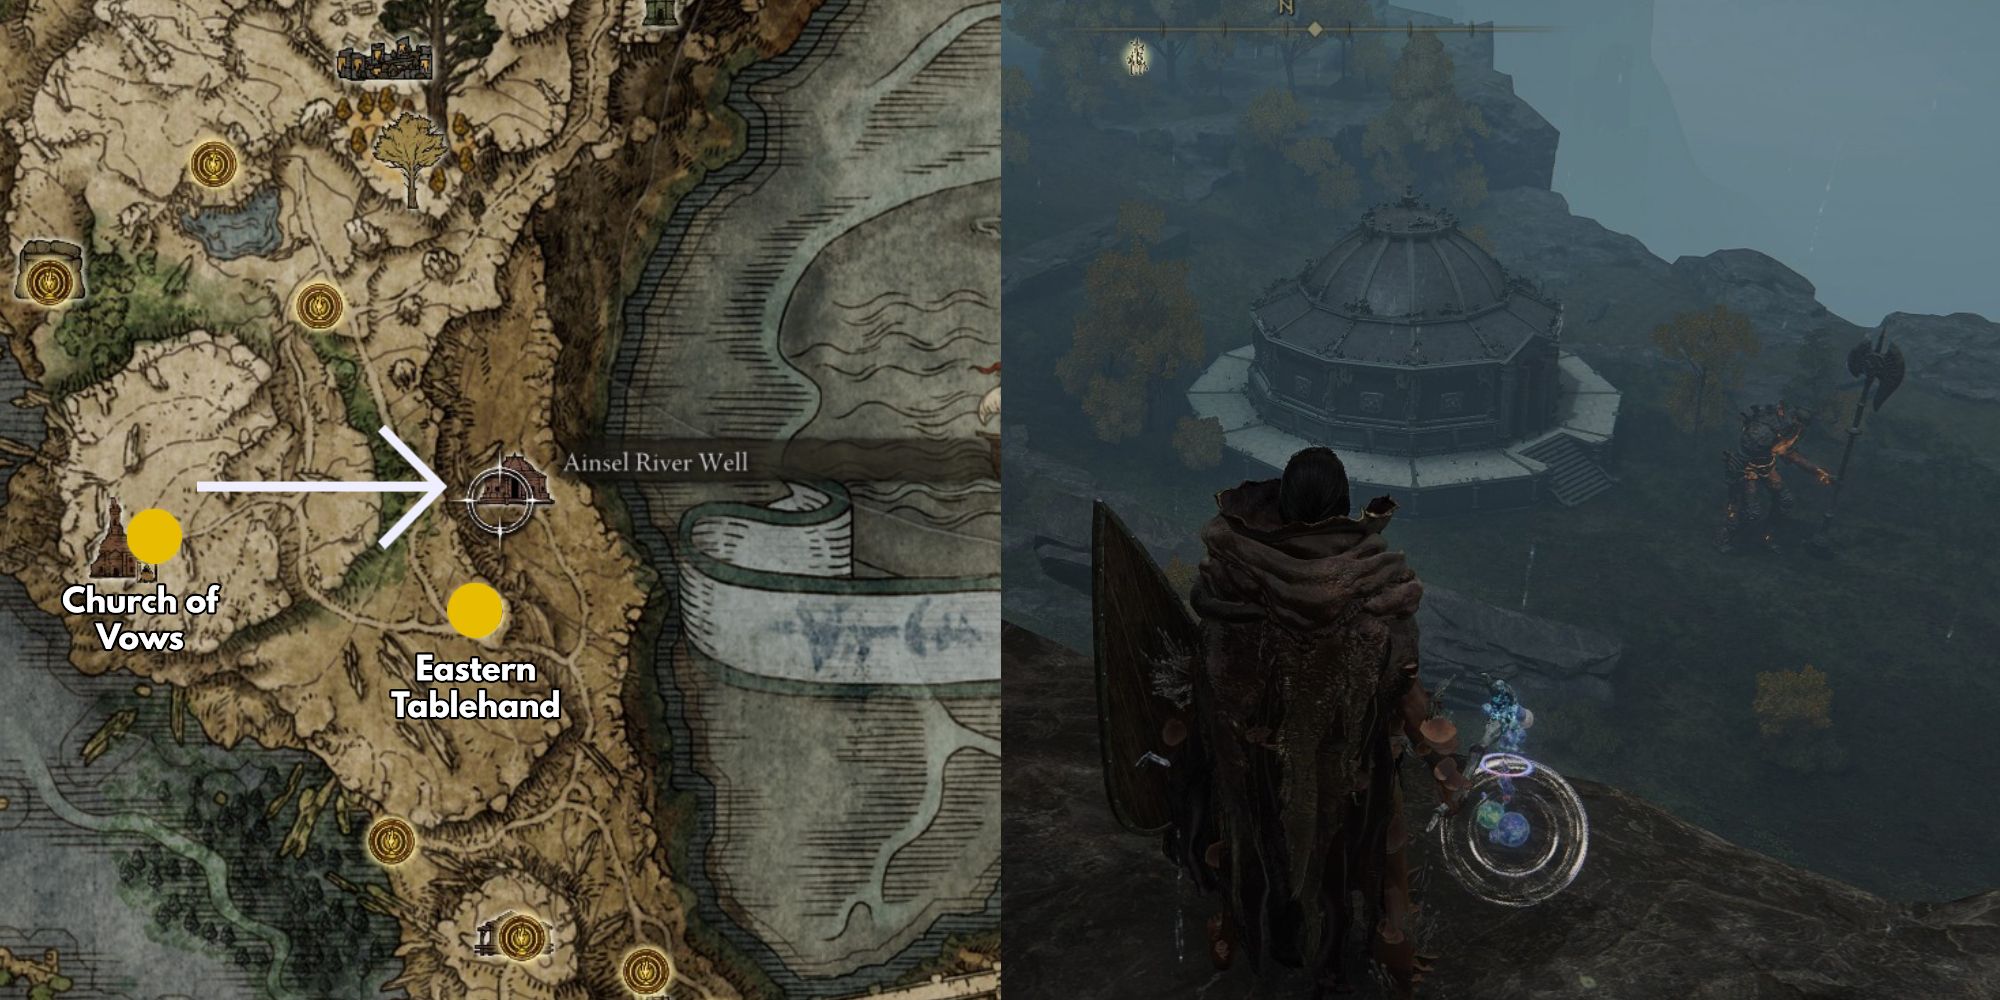
To enter the lower Ainsel River Depths, you have to use the Ainsel River Well in Liurnia of The Lakes. This is an lift that will take you lot below, much like the Siofra River Well in Mistwood. In that location is a large golem guarding the Ainsel River Well that tin easily be ignored. You tin can sneak around the behind of the well, bound onto it and sneak into the elevator bedchamber.
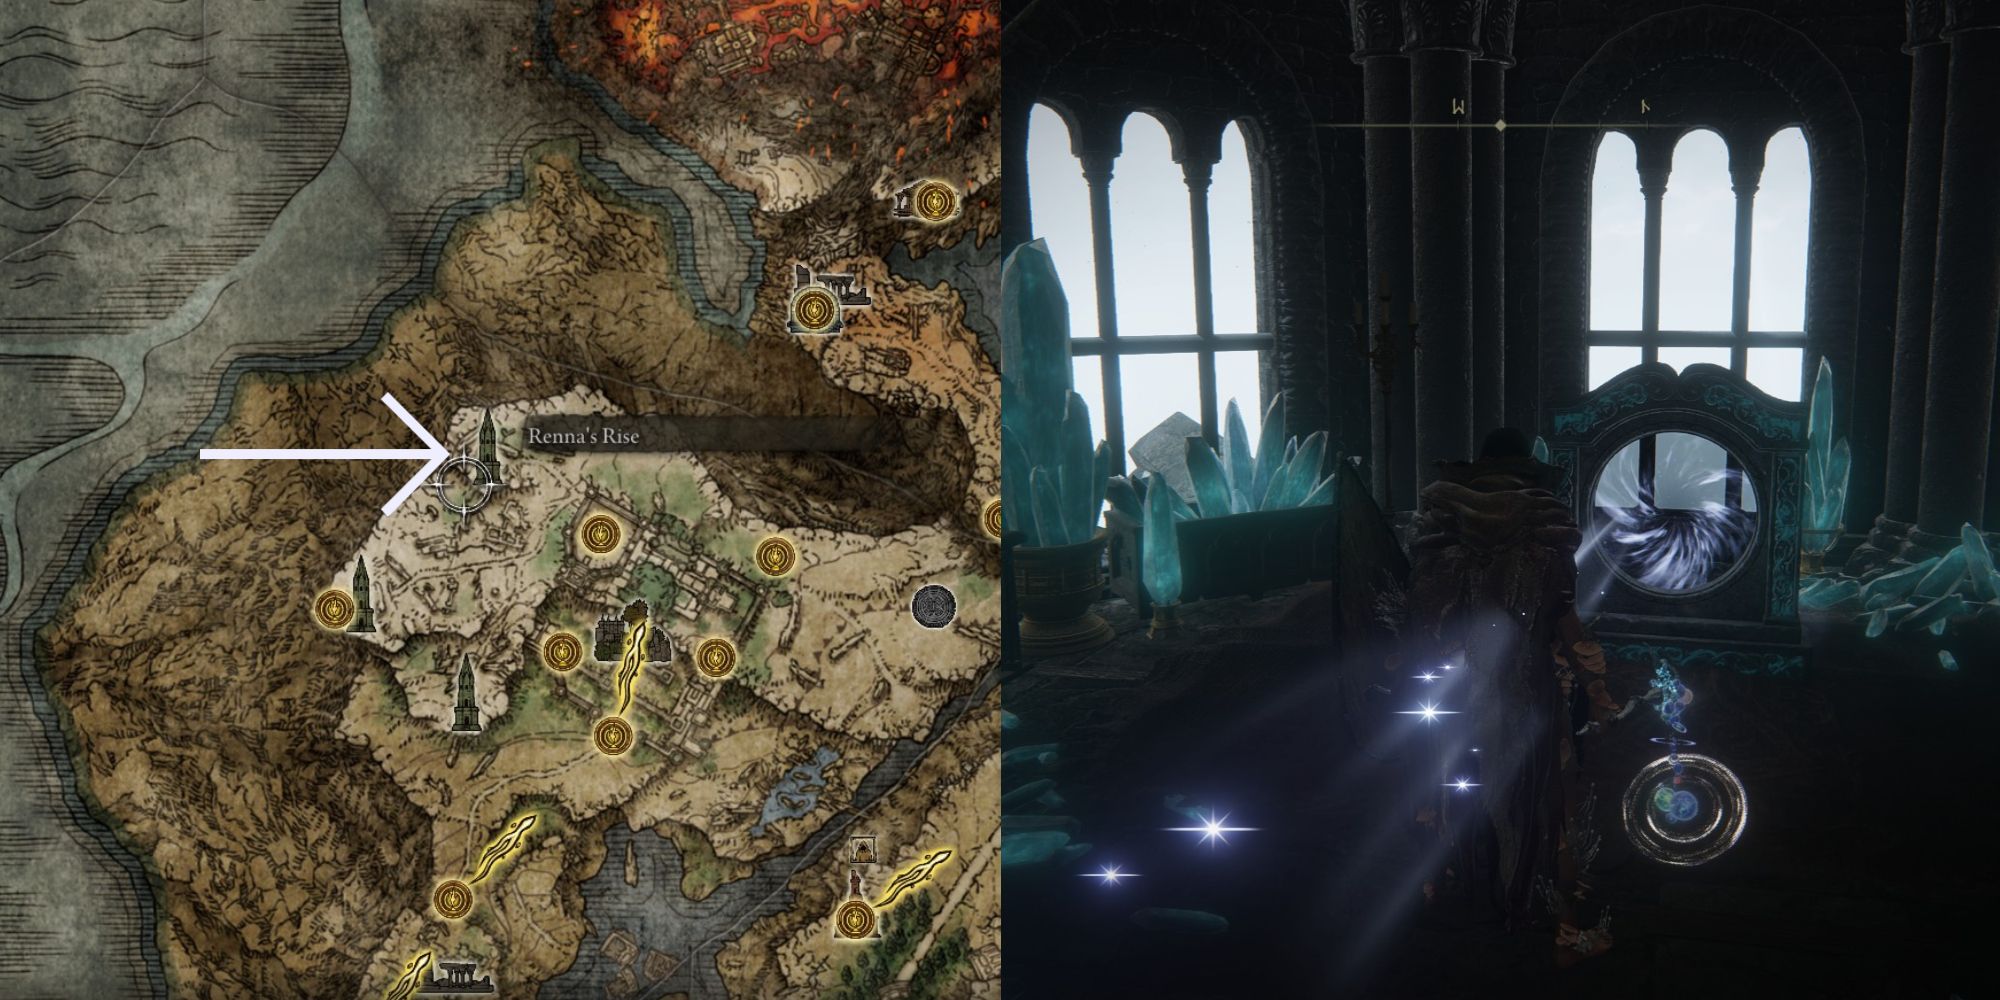
To enter the upper Ainsel River Master, yous tin either use a portal or travel via bury. When doing Ranni The Witch's quest, she volition somewhen give you access to the Renna's Rising belfry backside Caria Manor. Atop this tower volition exist a portal, which will transport y'all to Ainsel River Main.
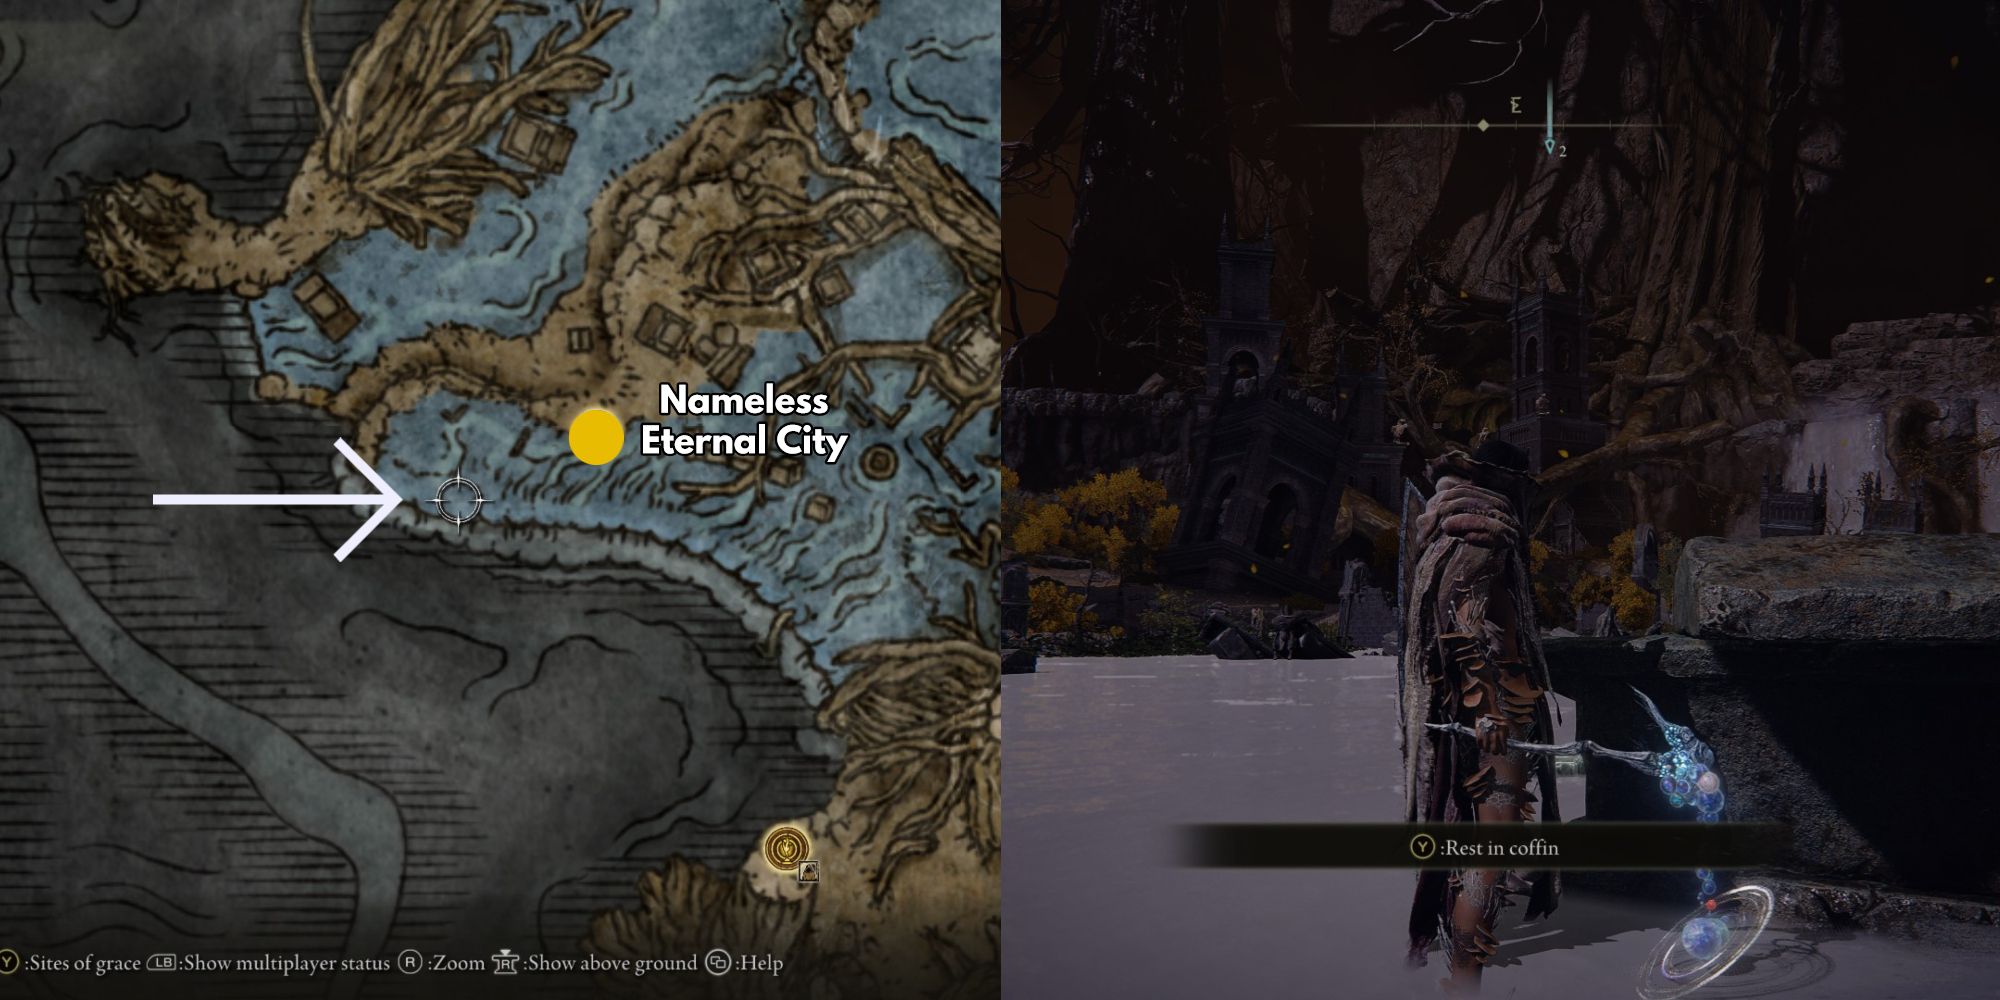
The concluding style to get into this underground river is by interacting with a coffin in Deeproot Depths. At the Site of Grace The Nameless Eternal Metropolis, at that place volition be a body of water flowing into a waterfall off the map. Head directly north-west towards a coffin at the very edge of the water. This will transport y'all to Ainsel River Main.
Ainsel River Depths Walkthrough
- Ant Cavern
- Sluice Gate
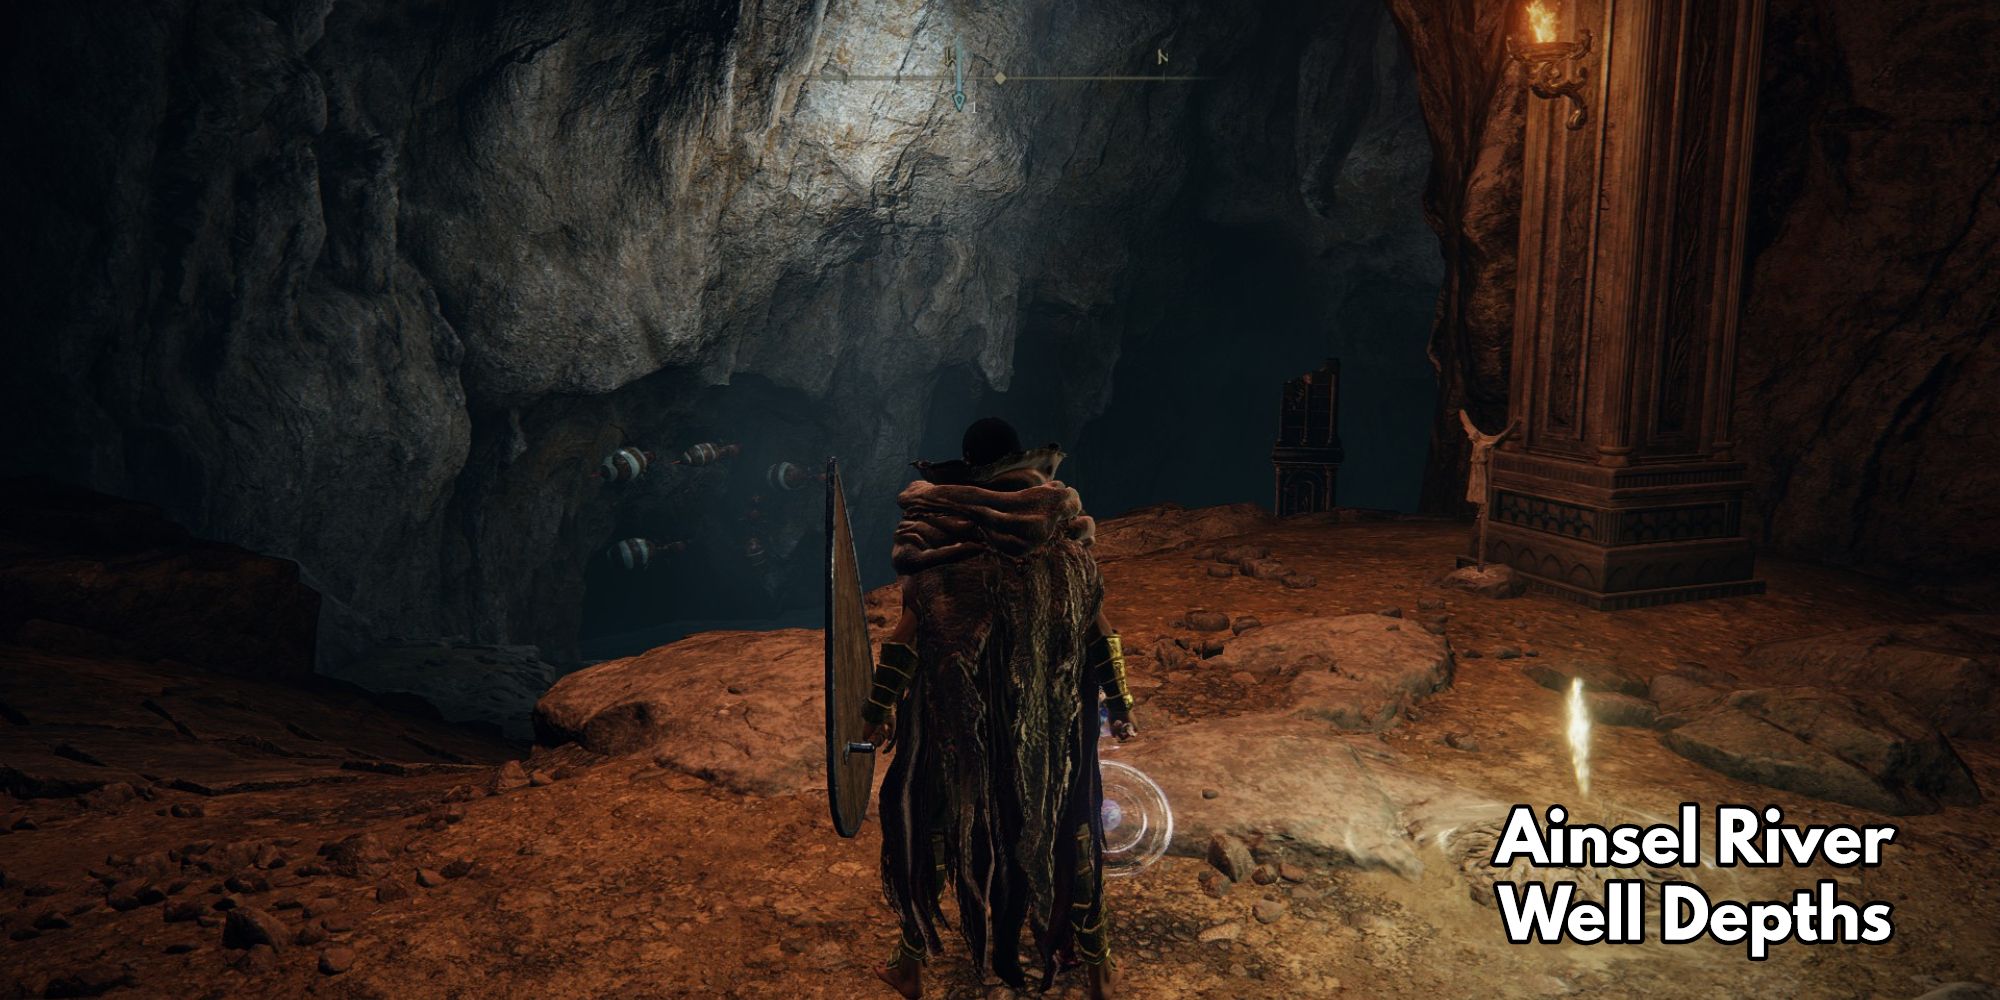
From the Ainsel River Well Depths Site of Grace, y'all want to enter the hole in the wall surrounded past ants. To the correct is a dead-stop with only some Magic Grease to boodle. Into the ant cave, you'll want to continue forward, winding to the correct. You lot'll shortly go out the cave and enter a large, open up area with a cobblestone bridge ahead. When walking along this span, look down. Y'all'll detect a ton of small enemies. Keep across the span to the Ainsel River Sluice Gate Site of Grace.
This is a expressionless-end. Just outside from where the Grace is, is a door that has an elevator inside. This is the Sluice Gate. It volition lower you to the enemies below. Y'all can summon hither, but it'southward mode too easy to get overwhelmed by all the enemies that appear and environment yous. The best option is to simply run past them into the next area.
- Malformed Star
- Map fragment
- Downstream Grace
The side by side area is far more than unsafe. A Malformed Star will be perched ahead, lobbing meteorites at yous. At that place volition also exist the same small enemies effectually. What you want to do hither is get-go make it behind the Malformed Star. The all-time manner to avoid danger is to go on running into cover as you lot inch your fashion closer. While behind cover, you tin kill any enemies that walk up to you. There will be enough space and time to accept care of them and motion into the next cover. When behind the Malformed Star, y'all cannot be attacked by it. Behind the boss is a merchant and the map for Ainsel River.
From the merchant, y'all want to exit the safe zone and head directly right. There will exist a Grace you lot can bound down to. From this Grace, walk downward the dark river until you lot meet a small opening. There will be some ants inside. To your left is a expressionless-end where you can overlook Lake Rot, a whole dissimilar underground map. To the right is a boss and the terminate of Ainsel River Depths.
Head right, then right once again, and make a left. It'due south pretty night here, so you lot may desire to pop out a lantern if you have 1. This is the Dragonkin Soldier of Nokstella. Later defeating him, he will driblet the Frozen Lightning Spear Incantation. At that place is a treasure chest in the small room he spawned in front of. Inside contains Swell Ghost Glovewort, an important item for upgrading Spirit Ash summons.
From here, there is nowhere else you can become. Behind the minor room, down the waterfall, you lot will observe a Site of Grace in the distance. You must now get out Ainsel River Depths and employ one of the two ways to enter Ainsel River Main to continue traversing through the river.
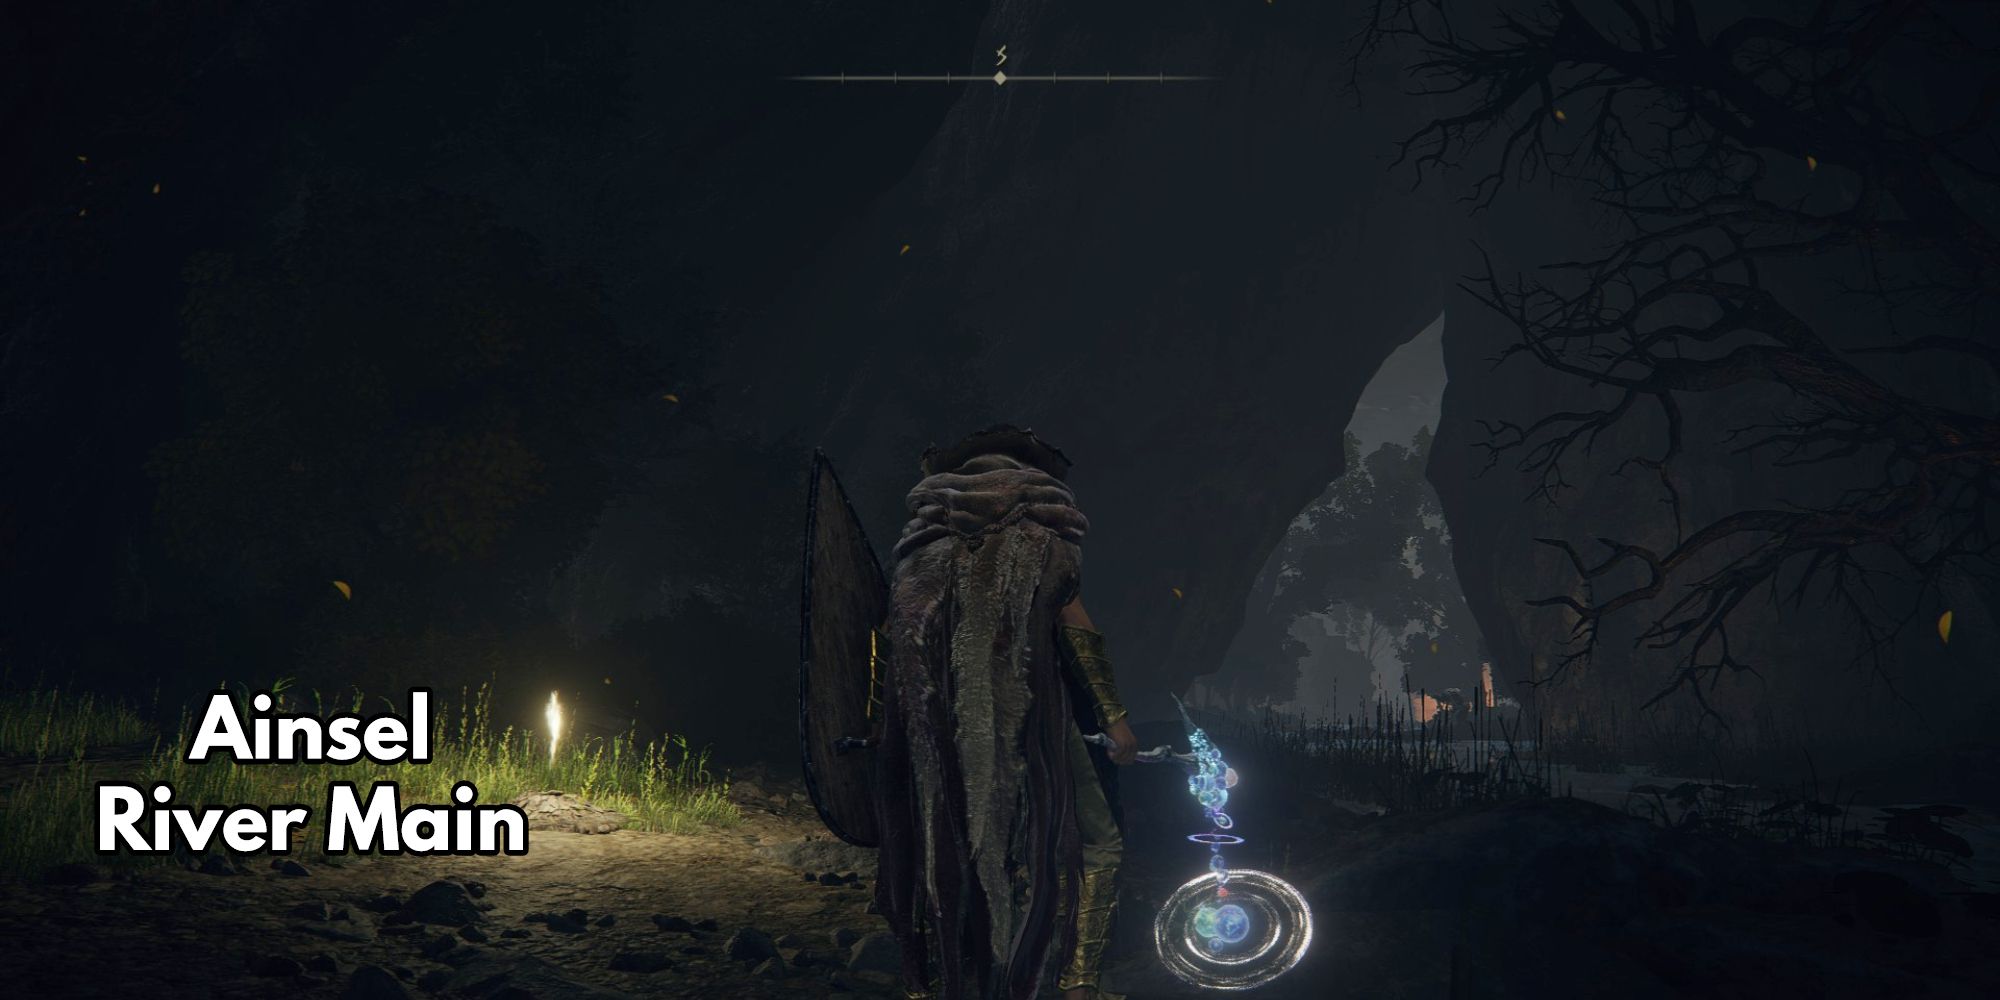
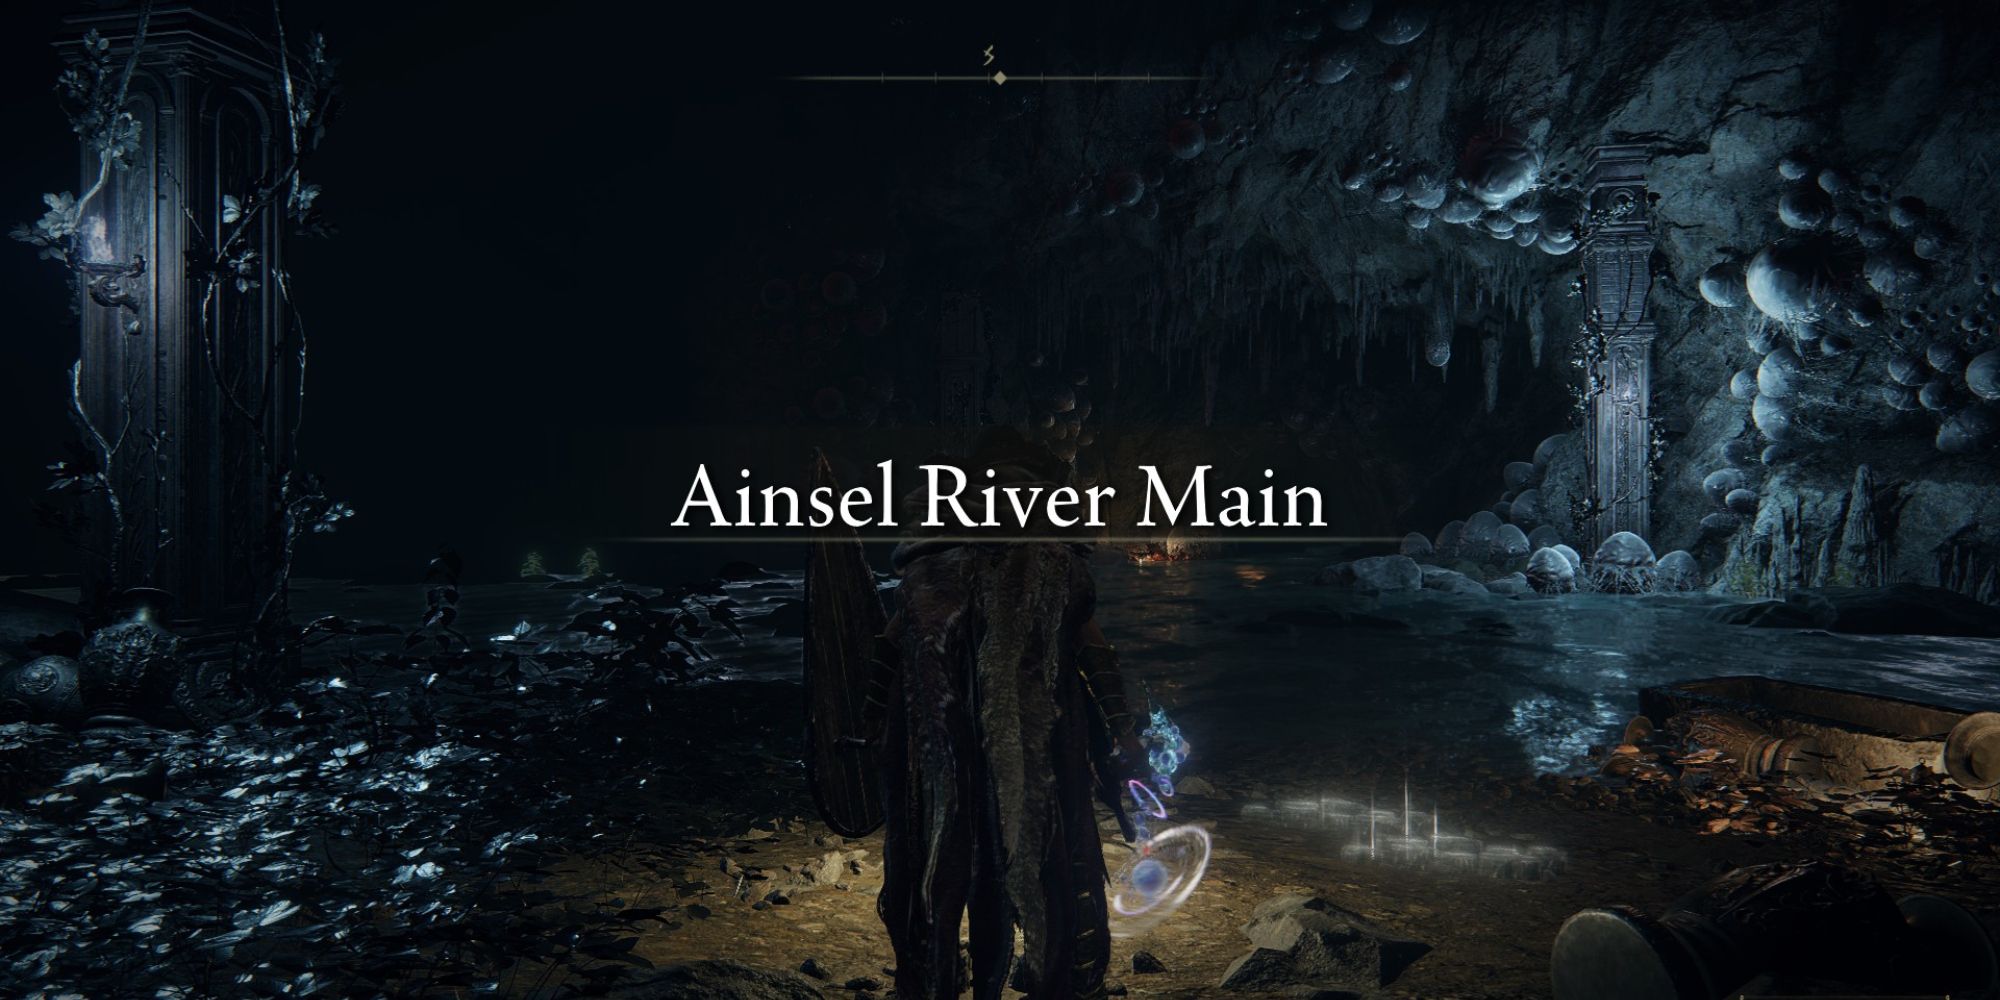
Ainsel River Main Walkthrough
- Malformed Star
- Wing of Astel
- Nokstella
Directly by this Site of Grace is however another Malformed Star. Once again, y'all want to keep progressing frontward while running from embrace to cover and killing any smaller enemies that get besides close. From the broken ruins, you can use ranged attacks to impale the Malformed Star from afar with ease. Assail with magic or arrows so retreat back into cover. You tin can likewise rush the boss and attack his caput from behind. Malformed Star's don't move or plough around.
Behind the star is the entrance to another ant cave. There will be a fork in the route. Head left beginning. There will be a foreign figure at the terminate of the cavern. Lure it in, considering once you get out you'll be attacked past the previous Malformed Star from Ainsel River Depths if yous did not kill it. Caput right and jump down to the beams behind the Malformed Star. There volition be a breast straight behind where the boss would be. Inside is the legendary Intelligence sword Wing of Astel.
Heading dorsum to the fork in the road, going correct will atomic number 82 you to the side by side area of the map. Nokstella, Eternal Urban center.
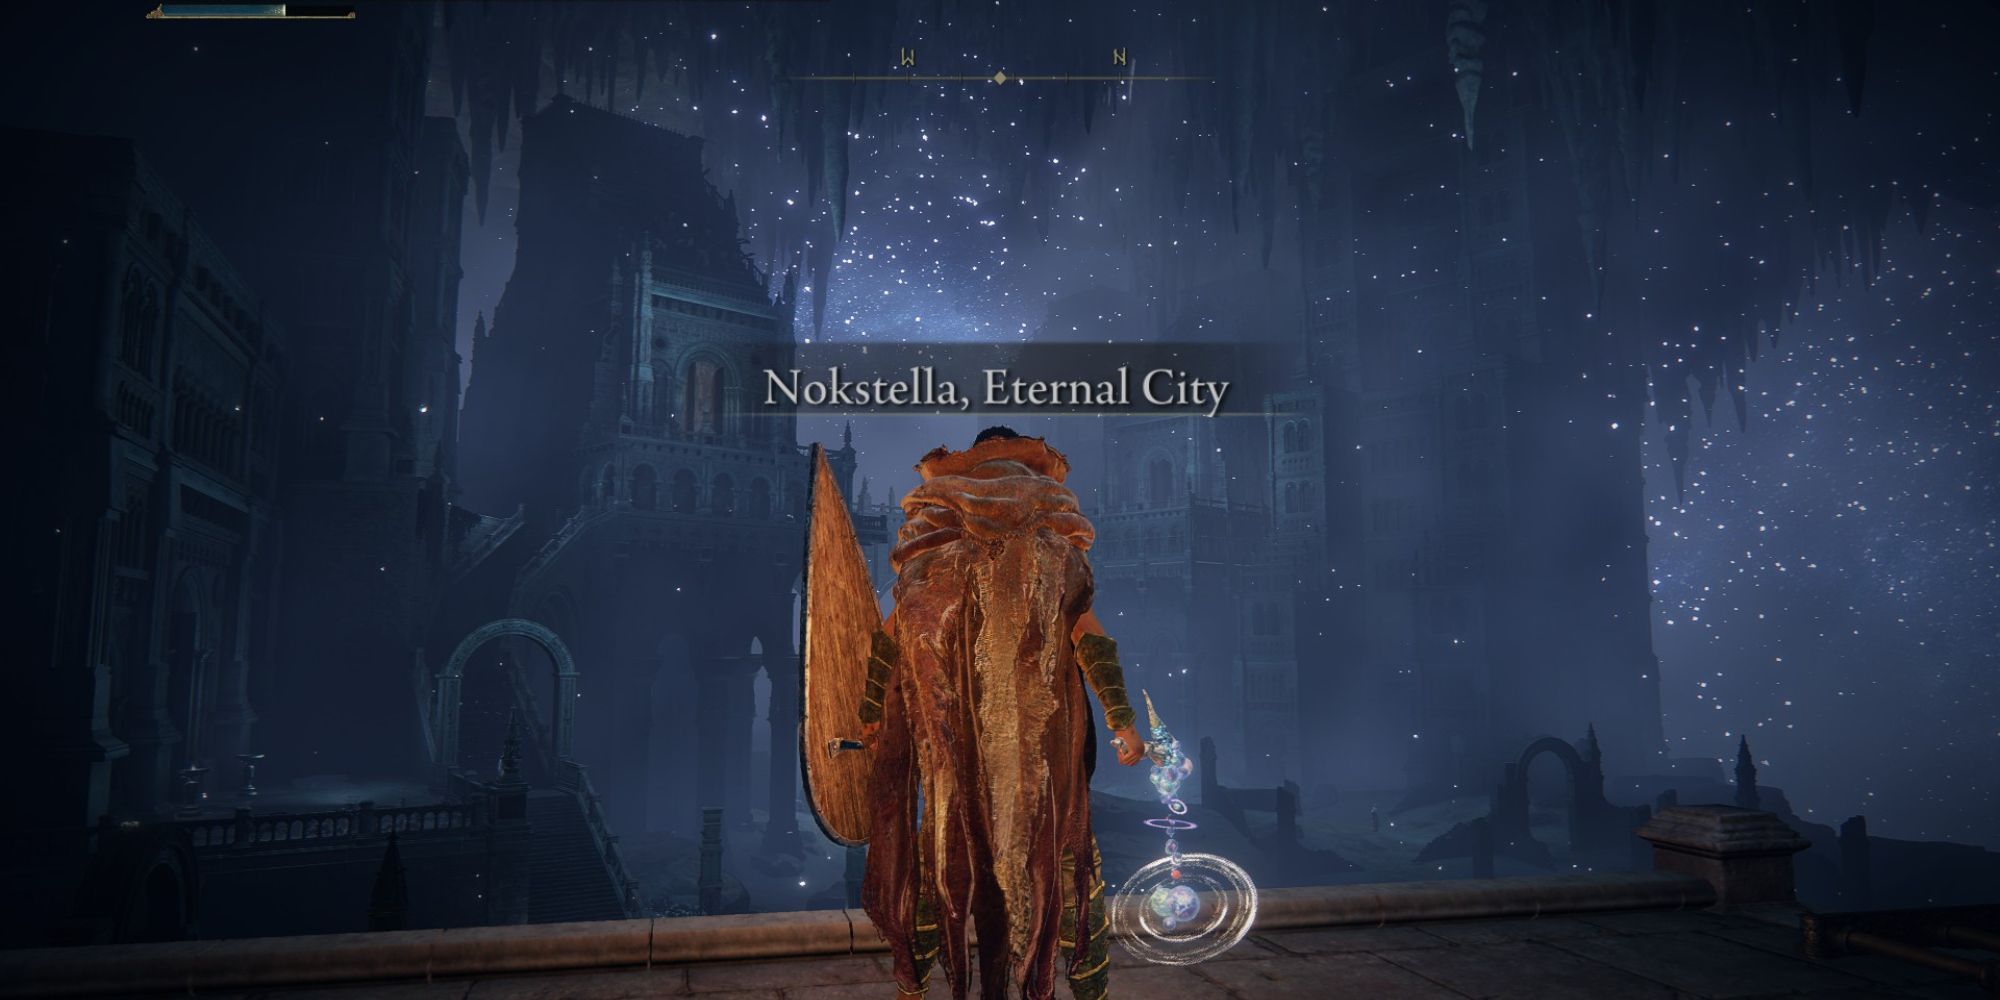
Nokstella, Eternal Urban center
- Up the stairs
- Ant shield and Bell Bearing
- Silver Assurance
From the Nokstella, Eternal City Site of Grace, in that location will be stairs direct in front of you. A speedy Nightmaiden will be patrolling the stairs. Lure her closer to the Grace, as further up is more than trouble. Directly to the left, but earlier the Nightmaiden on the stairs, there is a room with some other Nightmaiden. She guards a treasure breast that holds the ant shield, Pismire's Skull Plate.
Instead of going up the stairs in front of the Site of Grace, you can get right and hug the wall to your left until you come up across stairs nearly the end of the river. There volition be a Nightmaiden above guarding a chest containing Ghost Glovewart (9).
Atop the stairs volition be several, and we mean several, silver tear enemies. It's best to go them bunched together and slowly walk down the stairs, taking them out a couple at a fourth dimension. If they explode too close to each other, they will injure each other. Another option is to make a straight run for it, past them, but y'all may get stuck with so many in a tight spot.
Once the silver tears have been dealt with, y'all can head left up the stairs to observe another room off to the side. Inside is shielded silver tears that are harder to striking unless you lot become them from behind. Inside the room is a treasure chest that holds the Ghost-Glovewort Picker's Bong Bearing (2). Back to the top of the stairs, head right, and walk down the path. A silver tear will drop down behind you lot, merely they are slow, and it's only one, and so naught to worry about. You lot'll turn left up to some stairs and then come beyond a broad span. Every bit soon as you get to this spot, a rolling ball - you know, the ones that really want to kill y'all - volition kickoff rolling down the stairs ahead. No matter where you lot go hither, it volition hunt y'all down.
The best course of action is to sprint towards the stairs it'south coming down from. Have religion. Equally soon as the brawl starts rolling, sprint to the end of the stairs and hibernate between the railing and the nearest light mail. The ball will be stuck trying to go past this small-scale gap. Don't move too close to it or too far left, or it will get you. From here, y'all can easily starting time swinging at it until information technology's dead. After it's dead, yous're free to walk back downwardly the bridge. There volition be a sealed imp statue door to the right. Inside are two troubling Nightmaidens and a treasure chest harboring Spirit Ashes for Nightmaiden & Swordstress Puppets.
These deadly Silverish Balls driblet Larval Tears upon defeat.
Back to the stairs where the ball started rolling, to the right is another room with a treasure chest. Don't walk inside. Instead, wait upwards and utilise target-lock. If you lot walk inside this room, the door will close behind you and the ball will do everything in its power to crush yous. Ranged is the only style here. You can range set on the brawl while it'south nonetheless on the ceiling, and it won't drib downward.
One time it's killed, you can safely enter the room and loot the treasure chest which contains another Bang-up Ghost Glovewort.
- Trio of enemies
- Golden Seed
- Lift to Nokstella Waterfall Bowl
Next, become upwardly the stairs that the rolling ball spawned onto. Inside the next room will be a ton of silver tears and another rolling ball hiding on the ceiling. Instead of rushing in, try walking in slowly enough to trigger the ball to driblet and then lure the ball to the front doors. The ball cannot exit this room - y'all're substantially trapping it between the doors, where you lot can do gratis damage until it'southward dead.
When the ball drops and rolls towards you, it will kill some of the silvery tears for you lot besides! At the very end of this room is a chest with Somber Smithing Stone (seven).
Find an opening to the left of the room. There volition be a long walkway towards another room. Information technology doesn't become easier from hither. Inside this room is a Nightmaiden and 2 Silver Tear Mimics. You can summon here.
At the end of this room is a breast containing Moon of Nokstella. To go along frontward, whether you lot defeat the enemies or not, y'all must turn left where at that place is an opening to a cliffside. Jump down, there'south an elevator that will accept yous to lower Nokstella. Collect the Gilded Seed from the Phantom Tree and so head S, where you'll see an archway. This will exist another elevator that volition accept you to the last Grace of Nokstella and Ainsel River. From here, y'all volition have to face the Baleful Shadow if you're doing Ranni's side quest. Straight behind the Baleful Shadow is the archway to a new location, Lake of Rot.
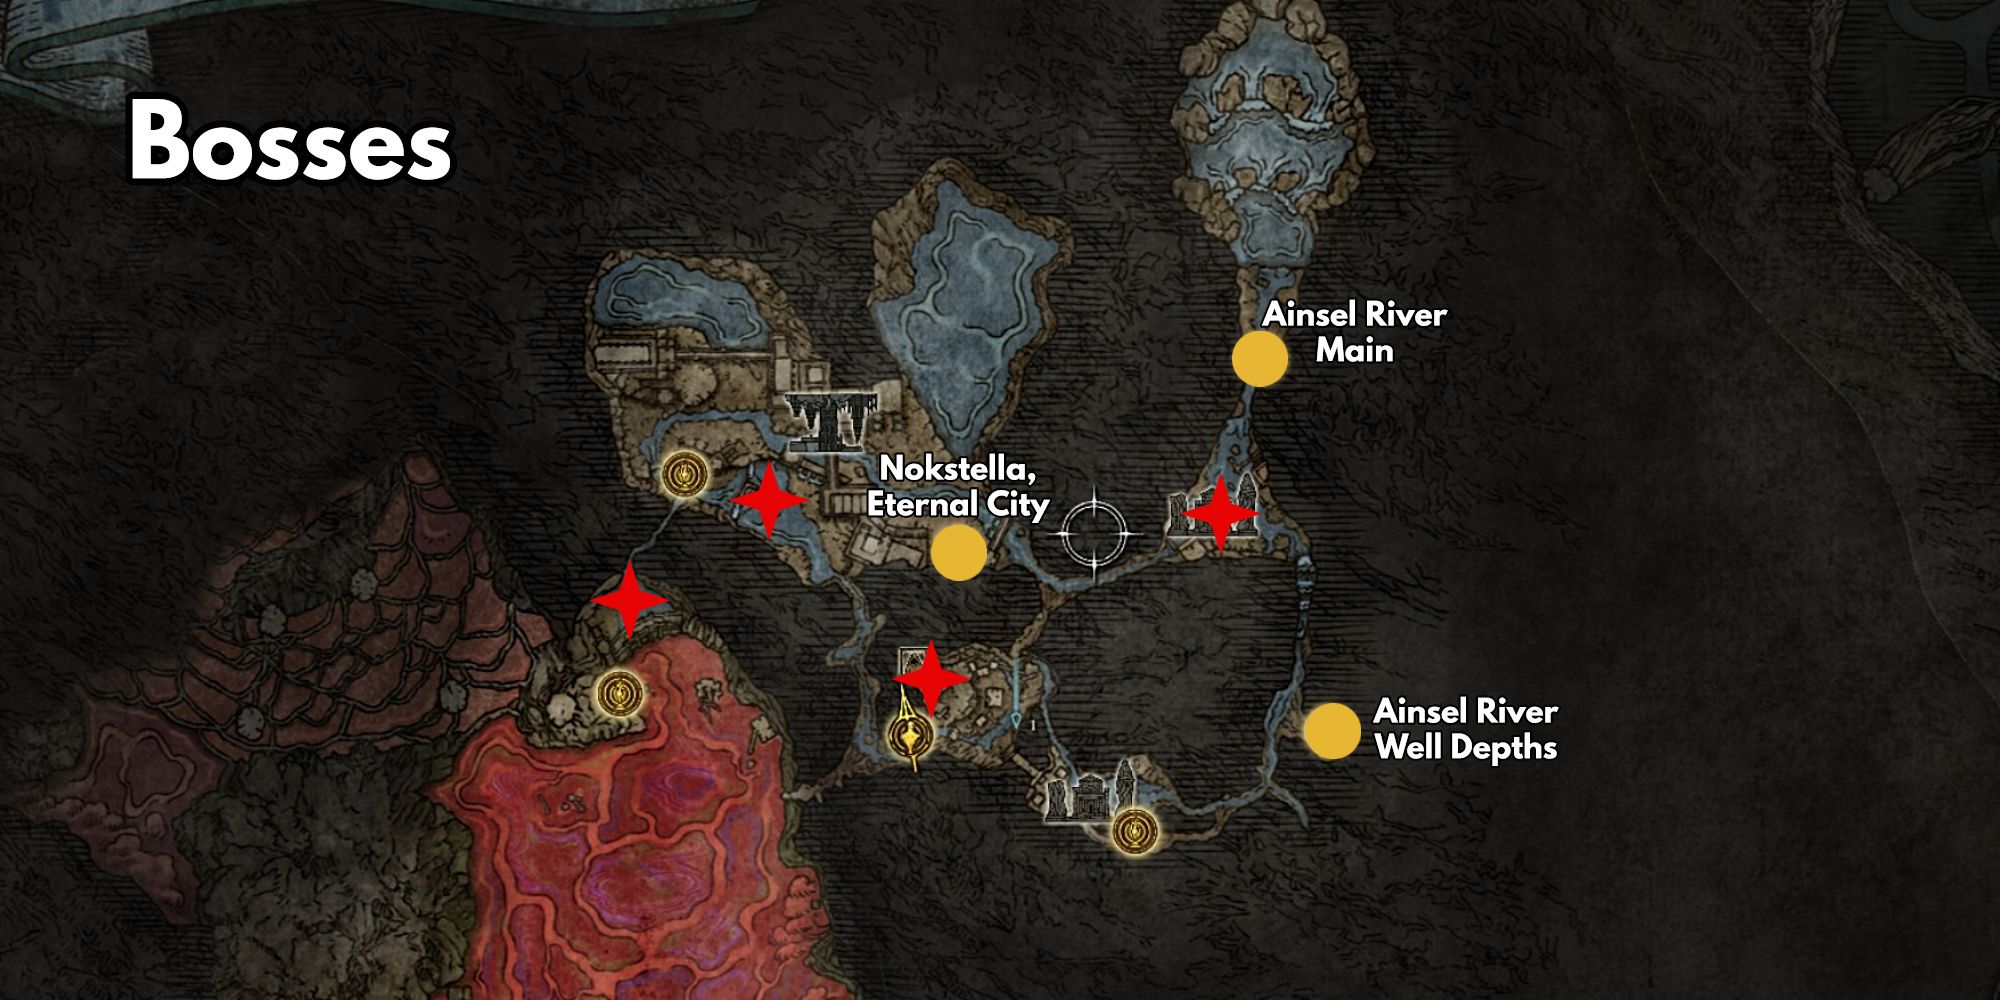
Notable Field Bosses In Ainsel River
| Boss | Location |
|---|---|
| Malformed Star | Ainsel River Depths |
| Dragonkin Of Nokstella | Ainsel River Depths, past the Ainsel River Downstream Site of Grace |
| Malformed Star | Ainsel River Primary |
| Calamitous Shadow | Nokstella, by the Nokstella Waterfall Basin Site of Grace |
Notable Loot In Ainsel River
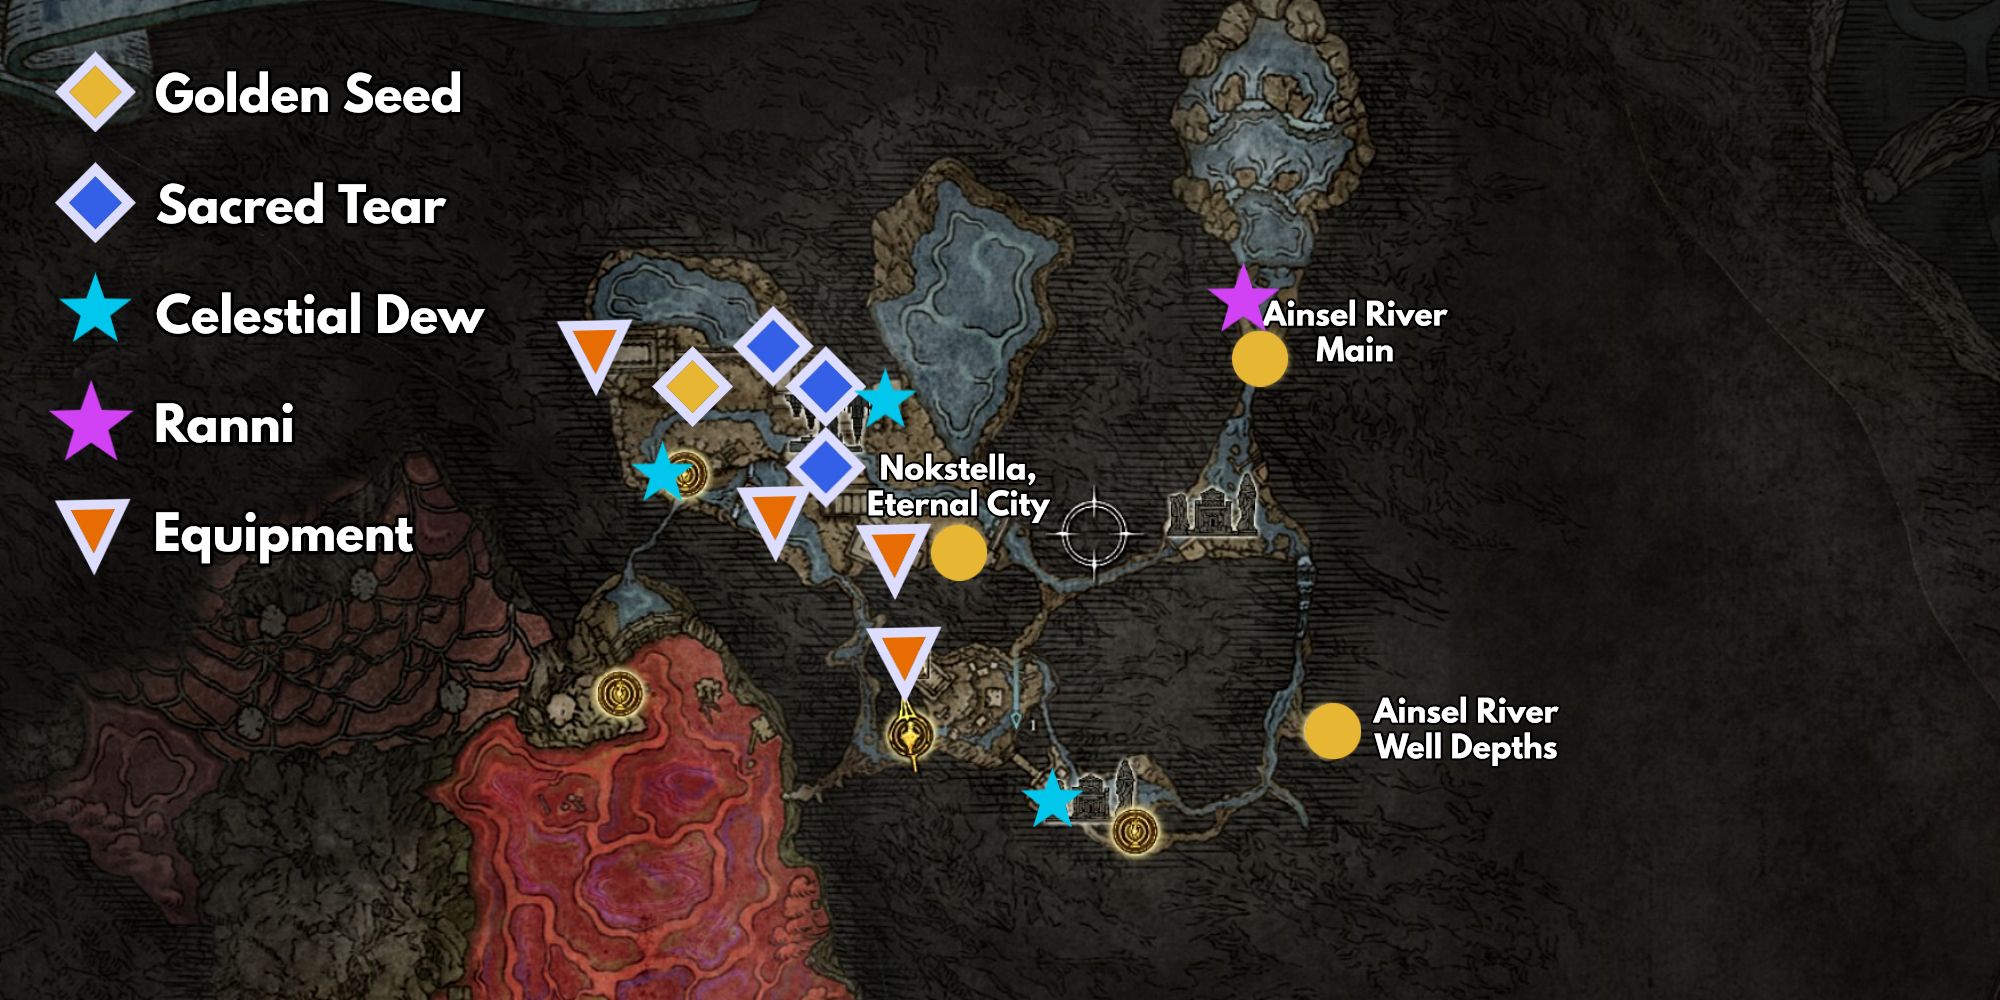
| Loot | Location |
|---|---|
| Aureate Seed | Past Ainsel River Sluice Gate. |
| Larval Tear x3 | Dropped by Silverish Ball enemies. |
| Miniature Ranni | North of Ainsel River Chief Site of Grace. |
| Celestial Dew x2 | On the right side of the river to the North of Nokstella, Eternal City Site of Grace. |
| Frozen Lightning Spear | Dropped by defeating Dragonkin Soldier of Nokstella in Ainsel River Depths. |
| Pismire Shield | Looted from a chest in a room to the left of the principal stairs in front of Nokstella, Eternal City Site of Grace. |
| Fly Of Astel | Looted from a chest on the beams behind the Malformed Star by the merchant. Accessible through Ainsel River Main. |
| Moon Of Nokstella | Looted from a chest behind a trio of enemies in Nokstella, just before the lift to Nokstella Waterfall Bowl. |
About The Author

Source: https://www.thegamer.com/elden-ring-ainsel-river-complete-walkthrough/
0 Response to "Can You Still Get Loot From Doing Raid Again Destiny 2"
Post a Comment